Enable Topics and Lessons

Initial Class Setup - Unlocking lessons and answers

Before you set up your class you will need to create it. Click here to see this process.

First Access – unlocking single lessons

As a teacher on first access all topics and lessons are locked and answers are hidden from student view. This is designed to give you control when and how students access content on the platform. For students to view online content you will need to open that particular lesson or topic.

How to set your first lesson/ Set lesson due date:

  1. Navigate to your class page and open the topic you are teaching. 
  2. Within the lessons row, click on the locked button and select unlocked from the dropdown. This will change to unlocked text. At this stage you can also set a due date by clicking the calendar icon.
  3. The lesson will now be unlocked for your students. 
Below shows student view of a book that has 2 topics with at least 1 lesson unlocked. 

Bulk Lesson Unlocking

Navigate to the topic and select the tick box beside Name. You will now notice a button that lets you unlock all lessons appears at the top of the list.

Lesson States

Lessons are locked by default. 

  • Locked – Students have no access. They will see a lock icon beside the lesson name.
  • Unlocked – Students have full access. This can be set with or without a due date. They will see an unlocked lock and will be able to click into the lesson.

Answers

By default, answers are inhibited (except multichoice which is enabled). You can manually turn these on for a whole class.

  1. Navigate to a topic.
  2. Click the slider for answers – when enabled this will show as blue. This can be enabled for the entire class or a single student (if done under the class completion page). 
  3. Answers will only show if a question has a typed response. If answers are enabled and a student has typed a response a green answer button will display under the text. Click this to see the model answer.
On the teacher platform answers are always on – type a word to enable the answers button.

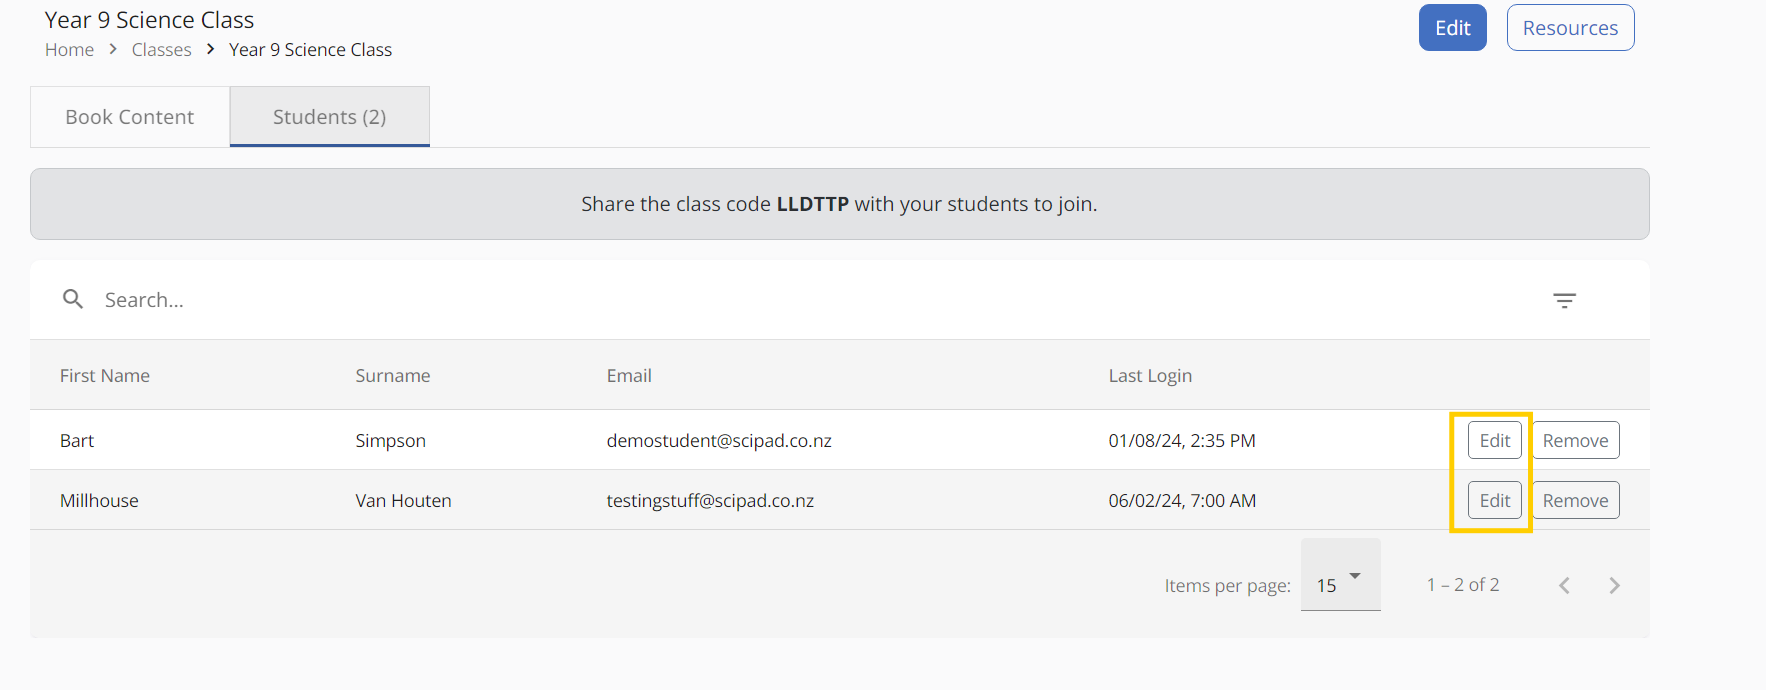
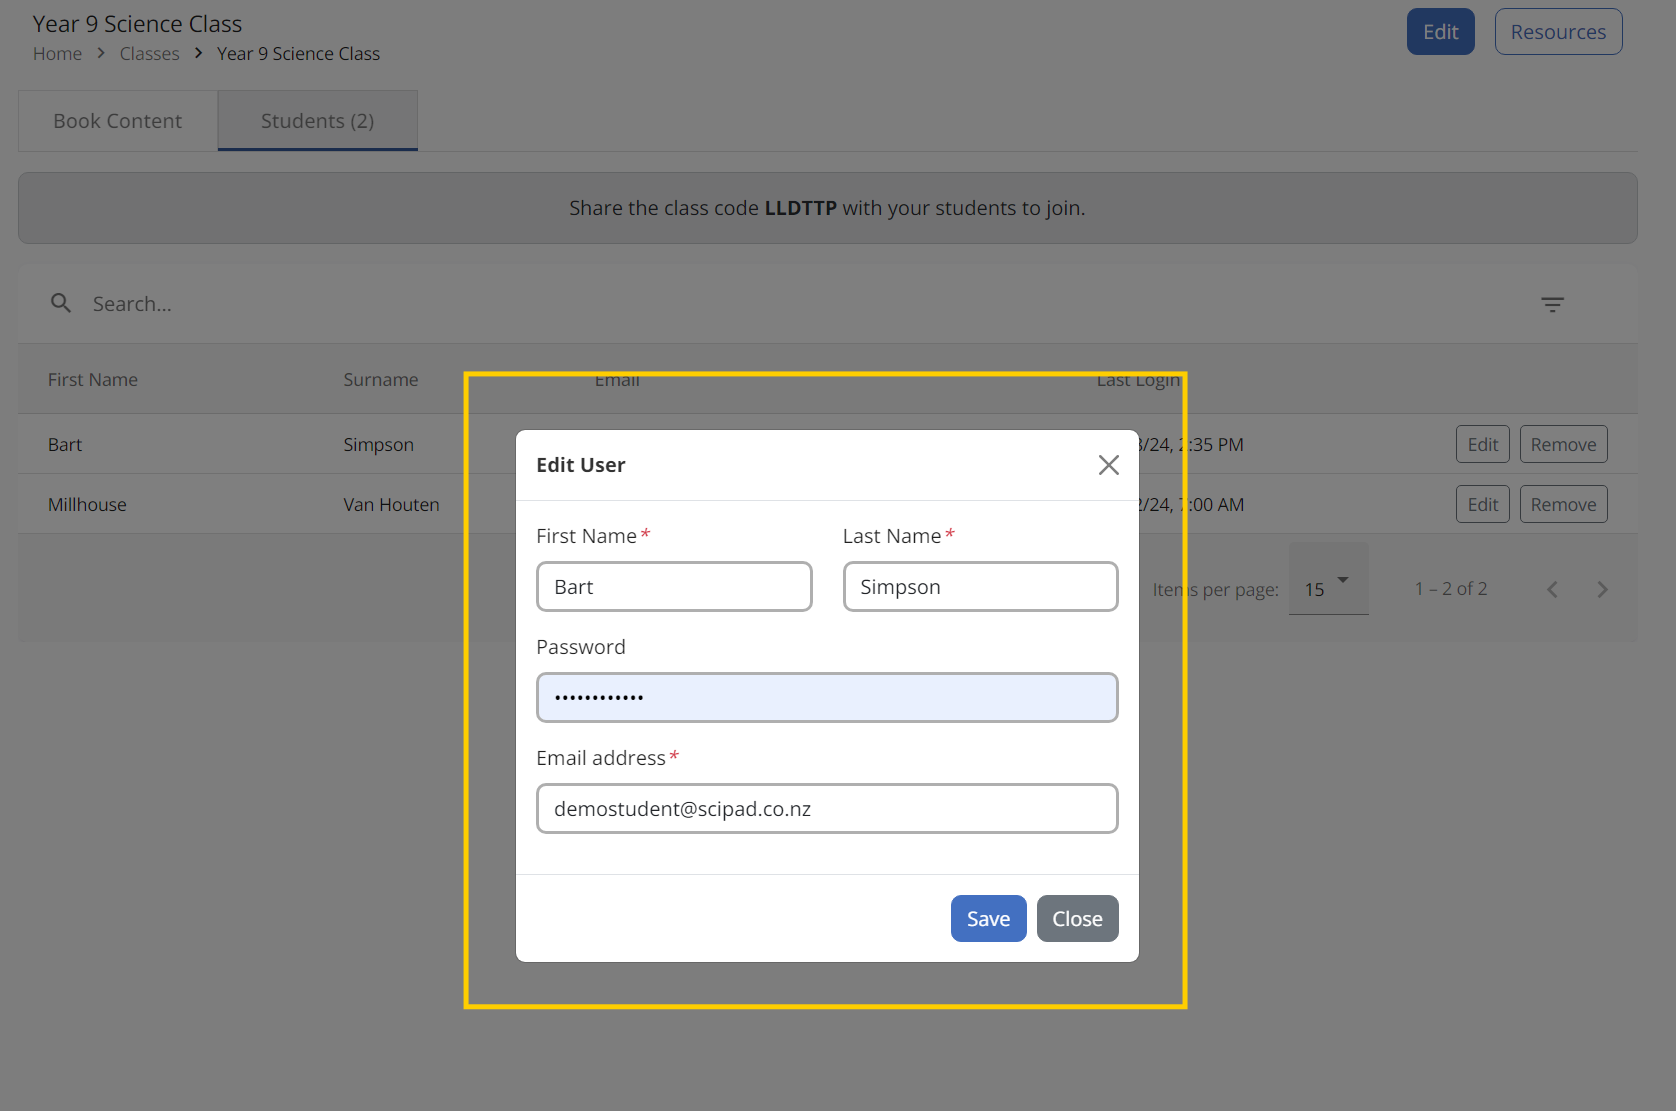
Editing Student lists

In addition to managing classes, you’ll also find it easier to edit student information. Edit and delete buttons are now available:

  • Within individual class student lists.
  • For admins who navigate to the “Students” tab in the top menu and search for specific students. Admin can now edit every class list within your school.

We hope these updates streamline your workflow and improve your overall experience.

If you cannot see the buttons on the right hand side of lists, please refresh your page.